Chicken Noodle Soup

We spend most of our weekday time on the road these days. We go from ballet to soccer to church to the library to doctor and dentist appointments. We love being on the go and have purposely stacked our schedule so that we stay busy. However, that doesn’t leave much time for cooking elaborate dinners. Our favorite meals are ones that are easy, healthy, and everyone enjoys eating. Now that the weather has turned a little cooler (thank you, Lord!!) we will be eating lots and lots of soup. Chicken noodle is a particular favorite because we almost always have the ingredients on hand and everyone in the family will happily eat it!

This week, I had three leftover grilled chicken breasts in the fridge, so I cut them up and added about three cans of chicken broth, some leftover whole kernel corn, a handful of leftover fresh mushrooms, some chopped baby carrots, and a package of egg noodles. I would have preferred to add about a cup of chopped celery, but I didn’t have any on hand. I boiled it all together until the noodles were done.

Not a gourmet recipe, but one that we enjoy nonetheless. It’s even better that it is full of veggies, it’s cheap, and that my children say, “Oh goody! I love chicken noodle soup.”

Do you have a favorite soup that is quick and delicious?

Blueberry Crisp

After several trips to the blueberry farm this summer, we have lots of blueberries. Lots and LOTS of blueberries. Jonathan has been asking for a blueberry cobbler. I tried one recipe that just wasn’t quite up to snuff. Today, however, I hit the jackpot. Apparently, Martha Stewart was on the Today show a while back, and she made a yummy-looking blueberry crisp. I can now give testimony that this creation is DIVINE! HEAVENLY! So, so yummy! Since I followed her recipe to the letter, I’ll just direct you to the recipe here.
When you get it ready to go into the oven, it should resemble something like this.
And if you hold your mouth right, it will look a little like this when it comes out. It is not very bread-y. It is mostly blueberries and juice, with a little crumby, buttery, crunchy topping. Got it?
We ate our with two scoops of ice cream because… well, why wouldn’t you?
This is one of my favorite new recipes. Hope you enjoy it as much as we did.

Making Sausage Balls With Daddy

Jammin’ Jammin’ Strawberry Jammin’

Summertime means that beautiful fresh fruit is readily available, and it’s cheap. Well, as cheap as fresh fruit gets, anyway. The other day I picked up three pints of strawberries and decided to make jam with them. I have been on a jam-making kick lately, and have discovered several delicious combinations of flavors that we have enjoyed using for jam. Today’s choice was strawberry and champagne. Did you know that you can make jam using alcoholic beverages? Well, you can. And strawberry and champagne is a delicious combination!
There are many sites you can go to to learn how to properly can jam. I won’t cover that here, because well, I don’t feel qualified for that. I’m certainly no expert on how to can, and I don’t want anybody getting sick because I didn’t give proper canning instructions. If you want to know the how-to’s of canning, you can click on over to freshpreserving.com and read up on it. But I did want you to have the recipe and instructions for making the jam.
First, find a darling eight-year-old who loves to help her mama. Have her cut up three pints of strawberries, discarding the tops. Chop very finely by hand or chop in blender. (I opted for blender.)
You will want to get them completely chopped, but not totally pureed. Jam should have some small chunks of fruit in it.
In a large pot on the stove, add the strawberries and one cup of champagne. I picked up this bottle from my sister-in-law’s wedding last year and never opened it, so today was a good time to let it go. Whisk in one box of Sure-Jell fruit pectin.
Bring your fruit and champagne mixture to a rolling boil over high heat, whisking constantly.
When it comes to a rolling boil, quickly whisk in seven cups of sugar. Yes, I said seven cups. Return to rolling boil, whisking constantly. When it reaches a rolling boil, let it boil for one minute. Pour immediately into sterilized canning jars. Continue canning process per instructions.
If you make strawberry and champagne jam, you will have happy people in your house.
If you make this yummy recipe, let me know how it turns out for you! Happy jammin’!

Memorial Day Menu

Happy Memorial Day to you! I hope you have had a relaxing day remembering those who have given their lives for our freedom. Freedom is indeed what we have experienced today.
Our Memorial Day menu was superb! Jonathan has become quite the expert on smoking whole chickens. He takes a whole fryer, coats it in Bad Byron’s Butt Rub (I get the Butt Rub at Piggly Wiggly), and uses his handy dandy little chicken smoking stands. He uses an electric smoker, and he leaves them on for about five hours. They are quite divine. (They look a little charred in the picture, but were in fact a perfect golden brown.)
He has also perfected a potato recipe that we LOVE. He boils red potatoes with the skin on for about 45 minutes. Then he smashes them with a stick of butter, sour cream, a few tablespoons of mayonnaise, salt and pepper. He doesn’t get them smooth, but rather leaves them the slightest bit chunky. Again, DIVINE!
When we were at the beach last week, my mom and dad gave us the biggest zucchini you have ever seen. We sliced them and grilled them with a little olive oil and seasoning. I didn’t have any of the nice large zucchini today, so I cut the small ones I had into spears, covered them with olive oil and Old Bay seasoning and Jane’s Krazy salt, and grilled them. They were excellent.
On our way home from the beach Friday, I stopped at Durbin Farms in Clanton and bought several ears of corn to grill. I didn’t read up on grilling corn until after I had shucked it. Apparently, you are supposed to leave the husk on. However, I did find several recipes in which you wrap the corn in heavy duty aluminum foil with a little butter and about a tablespoon of water. Grilling gave it a delicious flavor, and even gave it a bit of a different texture than boiling it. I will definitely be grilling corn again. I think it’s my new favorite way to make it!
Hope you have had a nice, long break this weekend!

Reuben Sandwiches

I love it when I can make two meals out of one. Remember the other night when I made a traditional Irish meal of corned beef and cabbage? Today I used the leftover corned beef to make reuben sandwiches for lunch. Since I’m not really one to run to the grocery just to make lunch on a Saturday, I used what I had on hand. My reubens didn’t have all the traditional reuben ingredients, but they were definitely delicious.

In a traditional reuben you would use rye bread. I happened to have white sandwich bread on hand, so that’s what I used. I sliced the corned beef as thinly as I could and piled it on. Top it with a slice of swiss cheese. I used some baby swiss that I bought to make Cuban sandwiches, and I actually think I liked it better. Comparatively, the baby swiss has a milder flavor and makes the regular swiss seem too sharp. Next came sauerkraut. I tried to drain away as much of the juice as possible so that it wouldn’t make the bread soggy. Soggy bread is bad, bad, bad. I always thought that a traditional reuben used thousand island salad dressing, but as I searched the internet I found many different sauce options. Some used spicy mustard, some used a mayo/chili sauce mixture. Some used plain mayo. I opted for something I had in my fridge (SURPRISE!) – brown sugar and pecan spicy mustard. Butter both sides of the bread and cook it in a skillet just like a grilled cheese. I probably could have used my George Foreman grill as well. I cook mine on medium low so the bread doesn’t burn before the corned beef can get warm. It gives the bread a nice golden color. Presto! Not a bad lunch for a Saturday afternoon!

In Honor of St. Patty’s Day, A Traditional Irish Meal

A few years ago, my mother-in-law wanted to take her “girls” on a trip to New York. We all packed our bags, called a babysitter, and kissed our husbands goodbye before she had a chance to change her mind. As it turned out, my father-in-law wasn’t too sure about sending this particular group to New York on his credit card without supervision, and I mean, can you really blame him? We sort of have a history. So the girls and George took off for the Big Apple. The trip was fabulous!
As my good fortune would have it, we were there for my 35th birthday. My sweet in-laws made dinner reservations on my birthday (which, by the way is on St. Patrick’s Day) at Tavern on the Green. Of course, the dinner special that evening was the traditional St. Patrick’s Day feast of corned beef and cabbage. Now, corned beef is not a dish that I would normally order, but I guess I was feeling a little adventurous. Or maybe I was confused because I was so totally out of my element. But order it I did. I wish I could tell you that it was the most fabulous corned beef and cabbage I have ever had. But if wishes were horses, beggars would ride. (By the way, I have never understood the real meaning of that phrase, so perhaps I just committed a major faux pas by using it incorrectly. I mean, I think it fits here, but I cannot be sure. Someone please advise.) Alas, I must report that corned beef and cabbage is not, in fact, the best meal that Tavern on the Green has to offer. Or perhaps it is, and that is why they recently closed. Maybe I should have complained. It could have saved their business.
Anyhoo… every once in a while I think about that meal and wonder if I could do any better. Last night when Bitty and I were in Publix, they had a big St. Patty’s display, complete with corned beef and cabbage. My curiosity got the better of me. And so tonight, I bring you my recipe for what turned out to be a delightful meal.
Here is what you will need:
 1 corned beef brisket
Red or Irish potatoes
Baby carrots
A small onion
About 4-5 cloves of fresh garlic
A bottle of beer
A can of chicken broth
A whole lot of ground sea salt
A whole lot of fresh ground pepper
A whole lot of ground thyme
A whole lot of oregano
A drizzle of olive oil
Smash and mince the garlic. Spread it over the bottom of your Crockpot. Next, layer in the potatoes. If you use the reds, put them in whole. If you use Irish, cut them into large chunks. Next throw in the baby carrots. Next put your brisket in, fat side down. Sprinkle the heck out of the brisket with the salt, pepper, oregano, and thyme. Drizzle the olive oil over the top – just a tablespoon or so. Quarter the onion and put those on top. Pour the beer into the Crockpot, being careful not to wash all the spices off the top of the brisket. Just pour it around the sides. Do the same with the chicken broth. Add enough wated to cover the brisket, which, I guess washed all the spices off the brisket, making that last instruction totally pointless. Sue me. It’s late. Turn the crockpot on low for eight hours. When you are ready to serve it, I scrape the fat layer off of the bottom. That is probably one of the unpardonable sins of cooking, but it grosses me out. I can’t have it on my plate. 

I wanted a truly traditional feast, so I made cabbage to accompany the rest. For that you will need:
A head of cabbage
Water
Salt
Jane’s Krazy Mixed-Up Salt
Jane’s Krazy Mixed-Up Pepper
Just get a big pot of water boiling. Throw in a lot of salt – maybe 1/4 cup. Cut the head of cabbage into roughly 1″ chunks. Throw the cabbage into the boiling water. Reduce the heat to medium and let it go for about 15-20 minutes. Don’t let it get too mushy. When you put it on the plate, sprinkle on the Jane’s Krazy salt and pepper. Sure, you can use regular salt and pepper, but why would you when you can use something as fun as Jane’s Krazy Mixed-Up? It’s like a party in a canister.
Let me now if you make it and if you like it. Honestly, cooking it in the Crockpot is the way to go because it makes it so tender. Yum!

Cooking with the Kiddos

My girls LOVE to cook with me. Even little Pitter Patter loves to sit on the counter and put ingredients into a bowl for me. Mary Anneliese has been cooking with me for years now, and it’s one of our favorite things to do. For Christmas, CC and Pop gave her two new children’s cookbooks that she has read cover-to-cover. She will look through them for things to cook for dinner or snacks. I feel like we’re “doing school” because she is practicing her reading and math skills. And who doesn’t enjoy having someone else cook for them! It’s a win/win situation!


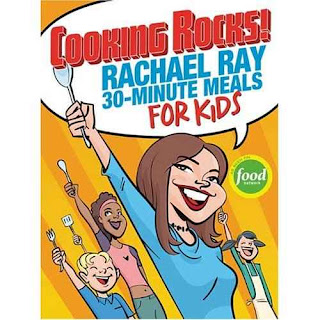
We got both the Rachael Ray book, Cooking Rocks! Rachael Ray Thirty Minute Meals for Kids, and the Emeril Lagasse book, There’s a Chef in My Soup! Recipes for the Kid in Everyone. I can’t choose one over the other, because they each have their own assortment of fun, delicious, healthy, kid-friendly recipes. They are both written on a child’s level. Rachael Ray’s book is broken down into recipes for each age group. Emeril’s is written to the 9-12 year old age group. In addition to the great recipes, they also teach kitchen safety, cleanliness, and proper food-handling techniques. We have really enjoyed our books, and if you have kiddos that love to help out in the kitchen, I think you would love them, too!

Saturday Morning Omelets

Having a HUGE Saturday morning breakfast is a tradition in our family. It is usually the only day of the week that we don’t have to rush out the door, and so we spend it cooking a big breakfast and being lazy before getting our day going. One of our favorite meals is these filling omelets, which we customize for everybody. I’ll give you the step-by-step instructions, and you can choose your own veggies and meats.

You’re gonna need some eggs. We do either one or two eggs for each omelets. We got glutinous once and thought we could eat a three-egg omelets. Wrong. We always add onions, green bell peppers, mushrooms, cheese, and chopped Conecuh sausage. You can also use crumbled sausage or bacon. Cook your meat beforehand. Do not add it raw!!!We sometimes add green chilies as well to give it a little kick. Whatever you like.


I find that it is easiest to cook omelets in an electric skillet. My mom had one of these when we were growing up, and I love the one I “inherited” from Jonathan’s grandmother. I use it for lots of other things as well, but it works out perfectly for the omelets. I spray it with cooking spray and then throw in my veggies. I let them saute for a couple of minutes.


After the veggies have been in the pan for a few minutes, add the meat. We love to use Conecuh smoked sausage for omelets, but we have also used regular sausage. We, and by “we” I mean Jonathan, dices it very finely and cooks it in an iron skillet on the stove. Once, it’s done cooking it is ready to be added to the veggies in the electric skillet. Allow it to cook for just long enough to flavor the veggies with the grease from the sausage a little.


Find a little braided-hair, pajama-clad, smiley eight year old to give it a stir.


This step is very important. You have to gather the veggie/meat mixture to the center of the pan. Make it a single layer – not too thick. You want the eggs to pour over it and fill in the cracks and crevices. If everything is too spread out, you will have bits and pieces that won’t be in the omelets. Those bits and pieces have been looking forward to being in this omelets, so don’t leave them out. They’ll be like the Israelites who walked and walked, but never got to enter the Promised Land. You don’t want that. Let them go to Canaan!!!


Now you’re ready for the eggs. Scramble your eggs very well in a measuring cup. This makes them easier to control when pouring them over the mixture. You don’t want out of control egg pourage. Pour the eggs over the mixture in a thin layer, covering all of the mixture with eggs. If necessary, pick up the skillet and tilt it to get the eggs to run in the right direction.


Next we’ll throw a little cheese on top and put the lid on to let it cook. Cooking them covered allows the eggs to cook more evenly instead of being too runny on the top. It also allows the cheese to melt evenly, making the omelets ooey gooey in all the right ways.

When the cheese is melted and the eggs are completely cooked, you are ready to flip it in half. You have to get the flip just right. This is a very important step. If the flip is off center, even just a little bit, the whole omelets experience is off.


Serve it up while it’s still piping hot with a side of cheese grits and a fluffy biscuit.


And of course, breakfast isn’t complete without and icy, cold one of these…

I Could Eat The Whole Pan Right This Minute!!!


Have you seen Leigh Ann’s post today about Ree’s Simple Perfect Enchiladas? Yeah, we’ll be having those sometime this weekend. I wish I had some of them right now!

Happy weekend, y’all!